
Office 365 Software Licensing How-To
Office 365 Account and Software Licensing How-To
Microsoft Office 365 is available to all SAIC students, faculty, and staff. Follow the instructions below to get up and running with Office 365. This guide will show you how to create an Office 365 account and install the software on your personal Mac or PC.
PART 1: CREATE YOUR MICROSOFT OFFICE 365 ACCOUNT
To create your Office 365 account begin by following this link. You may be required to complete a Captcha before you can create your Office 365 account. Start by clicking next and answering the puzzle given to you.
Image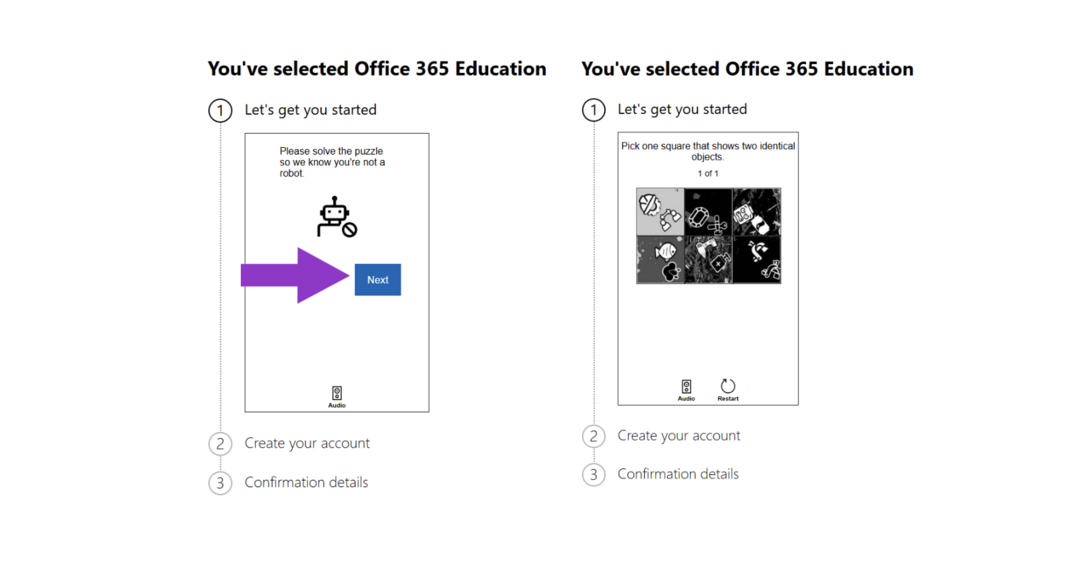
Enter your SAIC email address ending with @saic.edu (i.e. your SAIC username @saic.edu ). Please only use your @saic.edu email address when signing up, NOT your @artic.edu address. Click ‘Next’.
Image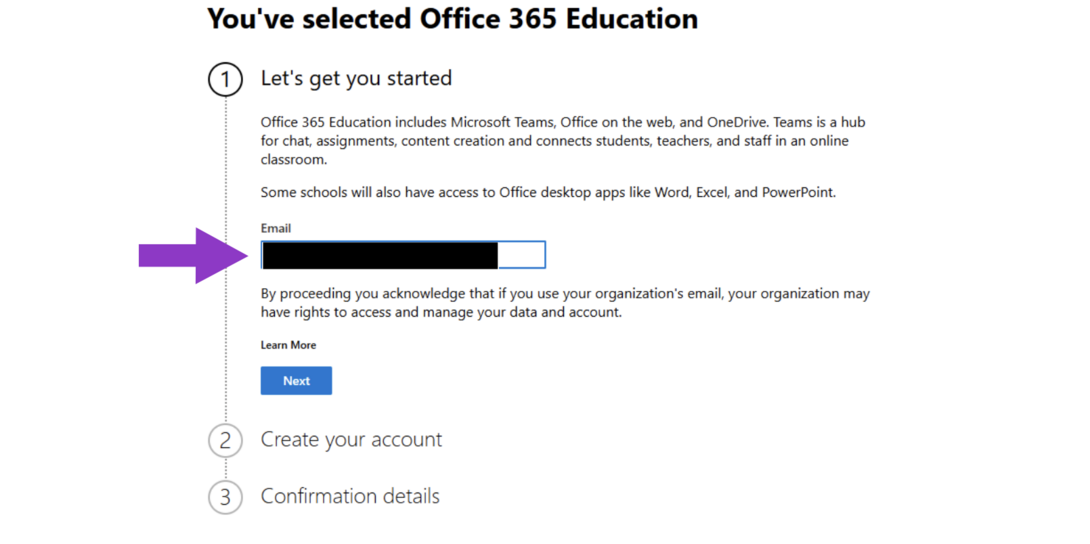
Select "I'm a Student."
Image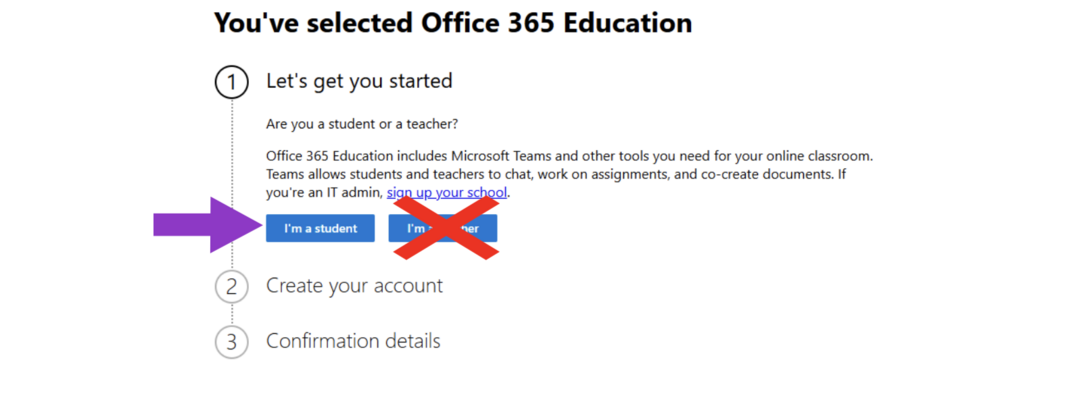
You will now need to enter some personal details on the next page.
Image
Check your school email inbox and you should see an email with the subject ‘XXXXXX is your Office 365 Education Verification Code’. Copy the code you see in that email.
Image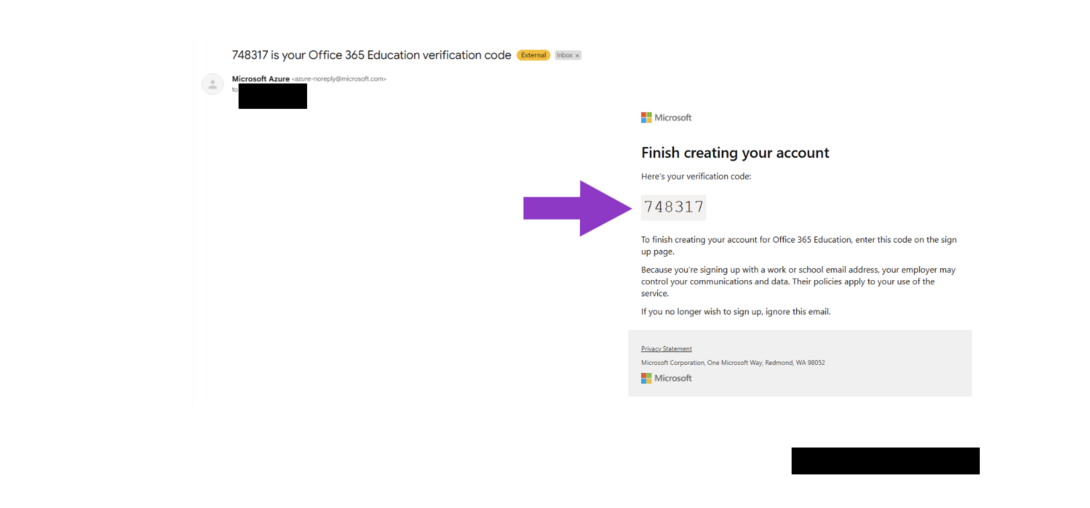
Return to the Office 365 Sign-up tab and paste your verification code in the verification field box then click ‘Next’.
Image
Select the ‘Skip and Go to Office 365 Education’ button
Image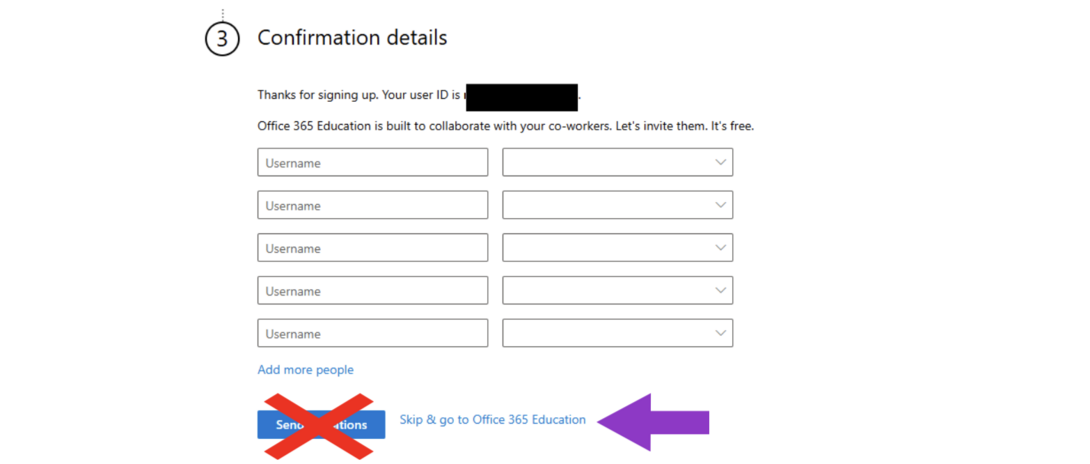
- This completes the Account Creation Part of these steps. For Office 365 application (Word, Powerpoint and Excel) installation instructions please proceed below for ‘Part 2: INSTALL OFFICE 365 SOFTWARE’
PART 2: INSTALL OFFICE 365 SOFTWARE
Follow these steps to download and install Office applications such as Word and PowerPoint.
After creating your Office 365 account you will see this screen below. If you are no longer at the screen below, you will need to login to portal.office.com with your Office 365 account. Select the ‘Get Started’ button and sign in with your email and password you created earlier.
Image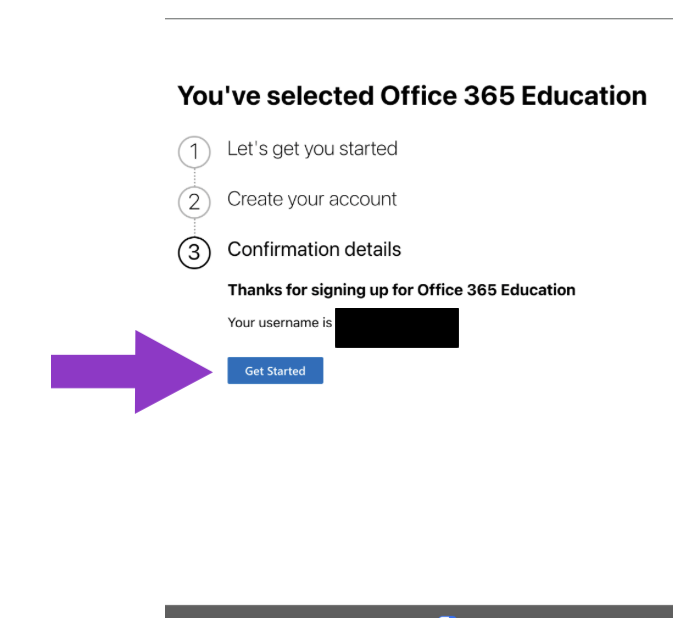
Next, the main page will be Microsoft Copilot - their AI interface. To find the application installers click on the 9 dots in the top left corner, then select ‘More apps’.
Image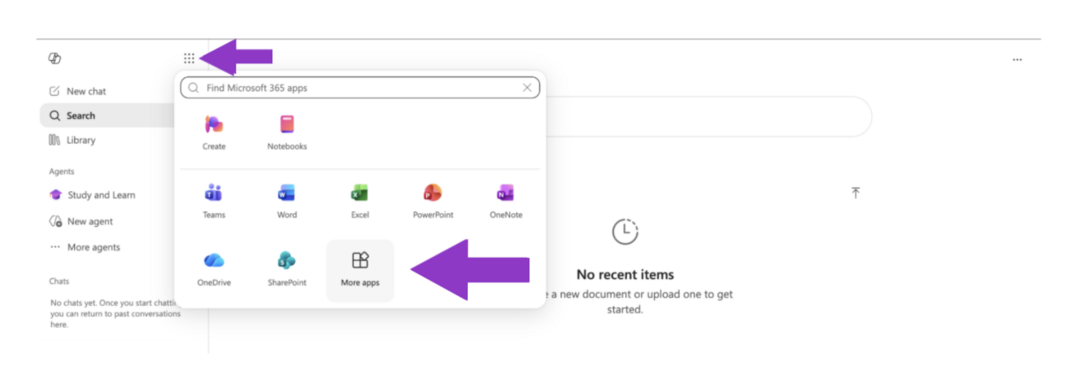
On the next page, click ‘Install apps’ on the top right hand side, then select ‘Microsoft 365 apps’.
Image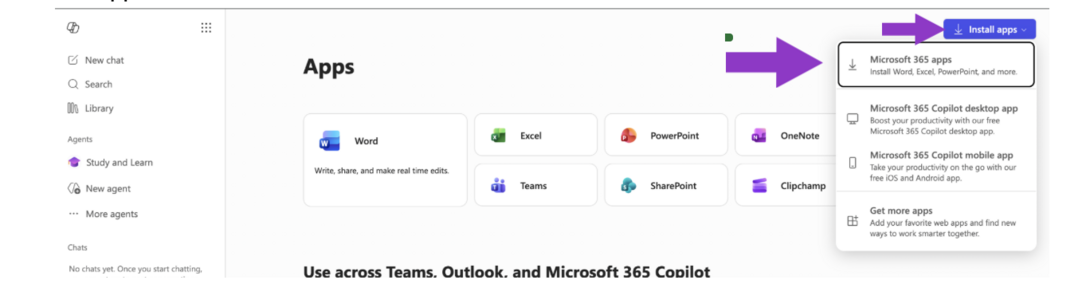
If you see this screen, click ‘Install Office’ and an installer will download. Once the installer downloads double click the installer and follow the onscreen instructions. Move on to step 6.
If ‘Install Office’ is not an option, please read step 5.Image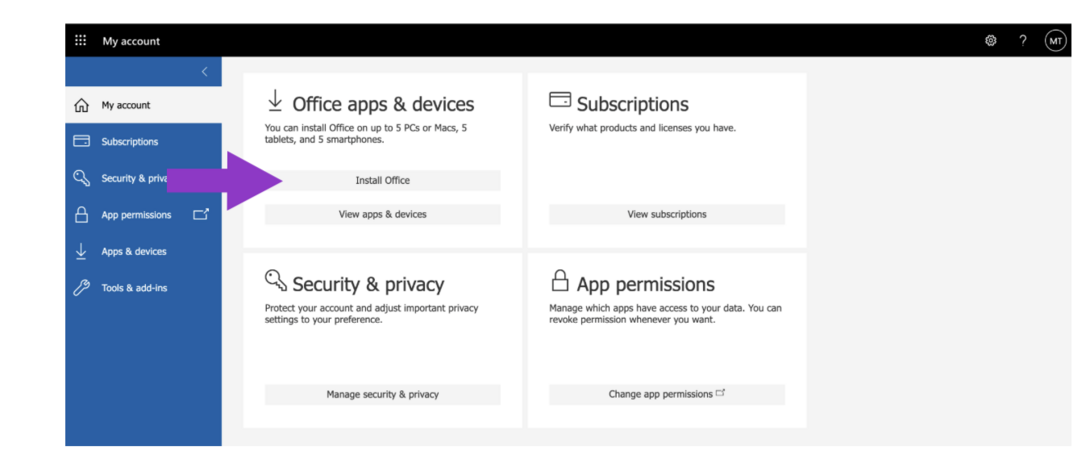
- If your screen does not have the ‘Install Office’ button, please send us an email at crithelpdesk@saic.edu. We may have to adjust your account settings.
After the installation finishes, open Microsoft Word. Enter the email address you used when you created your Office 365 account (e.i. sstude@saic.edu), then click Next.
Image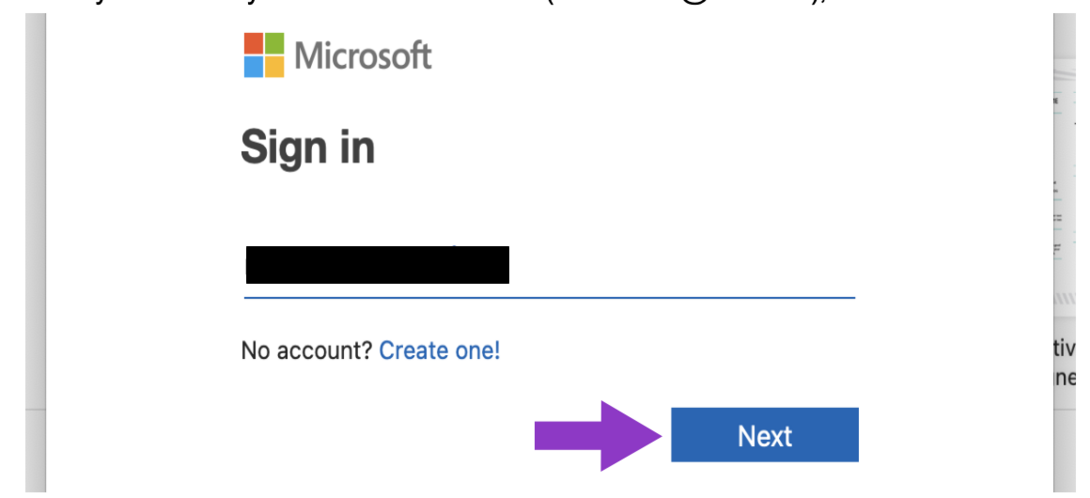
Enter the Office 365 password that you created earlier and click Sign in. On the next
page, click the blue ‘Sign in’ button.Image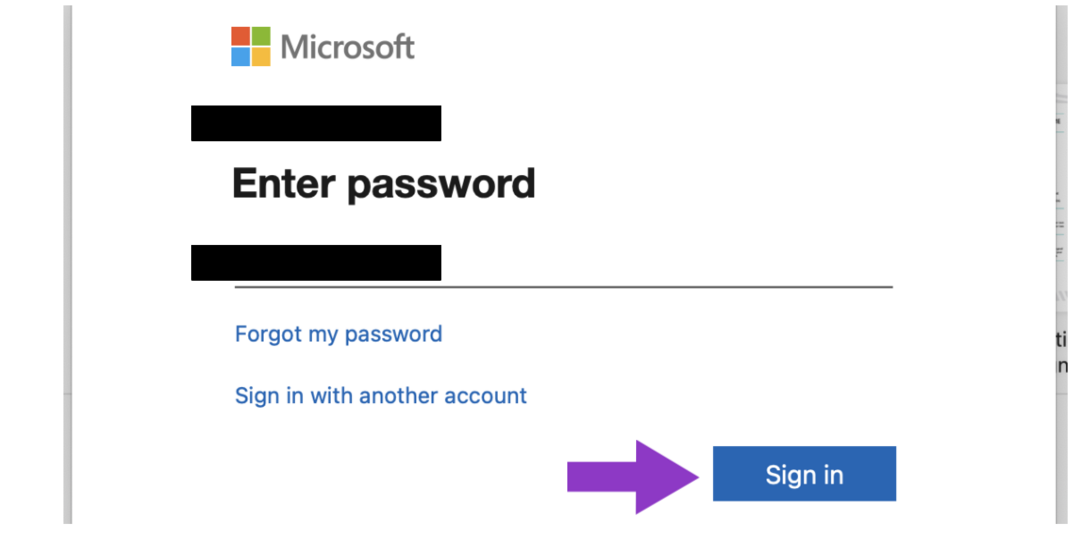
- You have now authenticated your Office 365 applications and may begin using Word or any other Microsoft Office applications that were installed earlier.